Creating fake-plants, cactus sculptures, with LEDs. A project that started on a rainy afternoon during the COVID-19 lockdown and might result in a series on cactuses, where each iteration aims to be better than the previous one.
I only had two plants in my room and they both died within a month or so. Maybe, if they involved LEDs, sensors and wires I would think about them more often. What started as a stupid joke, ended up as a cool one-day project: making a cactus with LEDs!
Because I always want to know everything, which often results in doing nothing, the plan was to hack something together in a single day. To deal with imperfection. To avoid theoretizing. To learn iterative approach to doing things. Thanks to Vita, I didn’t fall into the over-enginerring rabbit holes this time :)
How it’s made
We gathered some random stuff from around the house:
a plastic bowl with a lid
LED diffuser caps
piping isolation foam
I’ve got no idea why I had that isolation foam at home, but it was an okay (and cheap) material for the job. The diffuser caps were salvaged from some old xmas lights I believe.
First, we made a hole into the rice bowl’s lid with a utility knife, shoved the isolation foam inside and somehow shape it into a cactus. We then drilled the holes into the foam, fitting the diffuser caps nicely without gluing them or anything, so they can be replaced.
An 5mm LED diode fits inside the diffuser cap and all of them are connected to an old 5V phone charger. When it came to electronics, I spotted myself dreaming about a custom PCB and connectors and whatnot… I took a deep breath, said “NO”, and did the opposite: quickest and dirtiest wiring ever, using a duct tape and massive blobs of solder :D In retrospect, this was the best decision of the project.
Where’s the magic
It’s not rocket science, just a bunch of LEDs in a cactus-shaped foam, right? Well… yes, but it still took a whole afternoon to do it. But that is not why I am writing about it, really.
The best part was switching it on for the first time: half of the LEDs did not work at all, which was not surprising if I think about the wiring efforts. However, some LEDs blinked in random intervals, causing a strange, but kinda pleasant, candle-like flickering effect. It looks even cooler that way, actually.
So, what was the last time you made something blink without a microcontroller, huh? ;)
The first catctus (Frankencactus) turned out surprisingly well, in the sense of adding coziness of the space. Despite it’s technical flaws, it was appreciated by visitors and flatmates. Great success!
Since the motivation for building another cactus was high, I wanted to become diffuser-independentTM. Huh? Well, the original “diffuser caps” (photo below) were limited, since they were scavenged from some old christmas lights and I could not find anything similar on the internet. Weighting between different LED diffusion options, like 3D printing, paper and others, the idea of casting/molding seemed the most fun.
Silicone mold
There’s a nice overview of silicone mold-making techniques by Steve McDonald in this video. Using an ordinary silicone and soaped water, we formed a “snake” and pressed the original diffusers inside (with their necks sticking out).
LEARNED THE HARD WAY:
silicone smells like vinegar, badly. It burns your nose and makes your room disgusting.
it sticks to your hands and it takes forever to get rid of it. Tip to self: use gloves!
don’t get it on your clothes! Below is a photo of my hoodie, after the washing. Yep, that was embarrasing to explain to my flatmates….
The mold was dried quickly (approx. 15-20 mins) and looked okay. Rubber-like feeling, not super squishy, but flexible enough to get the original piece out. We filled it using a glue gun, until the glue started pouring out of the hole. We sliced the mold horizontally, to get the pieces out and finally drilled a hole into their necks, for the LEDs. Here are some results:
It took some attempts to get it right, mostly due to awkward glue gun and no constant inflow (I guess). However, it turned out pretty good eventually, it felt like real plastic. One of the questions was whether to slice it on the top (where the necks are) or at the bottom. I did it in the bottom for some reason, but it turned out to be a bad idea since the hot glue was escaping on the bottom while pouring it in. Slicing the mold on the top would probably be better.
How to make a better version of the cactus? Honestly, I’m afraid to even touch the first one: it flips over easily, diffuser caps fall out sometimes and half of the lights don’t work anyways. Improving on this shouldn’t be too hard.
Sculpting
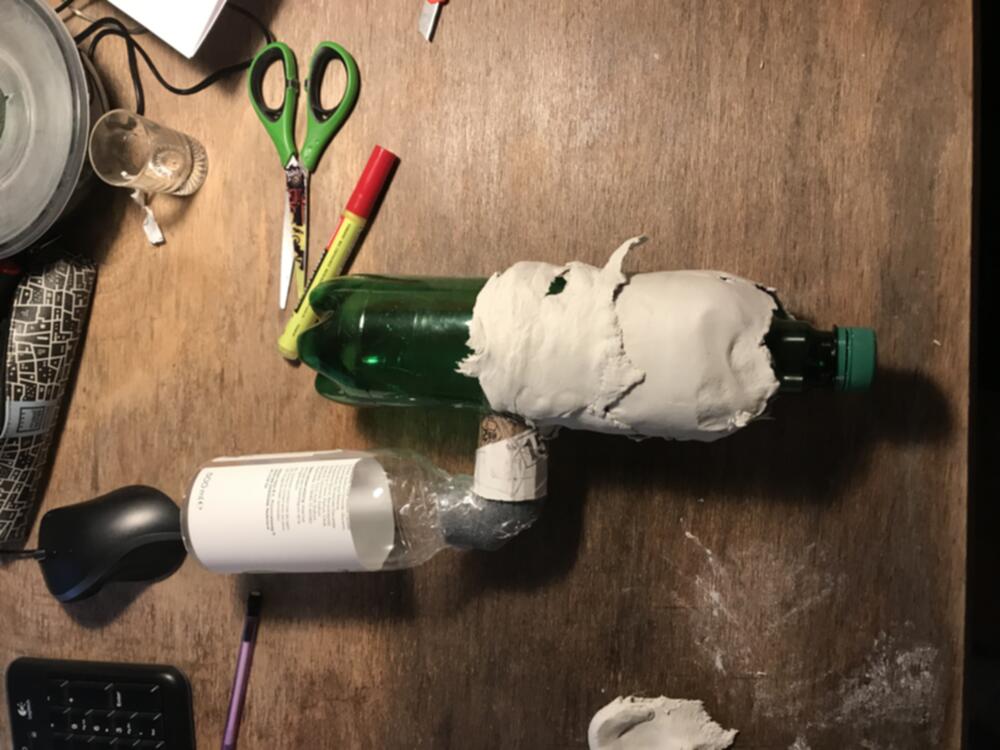
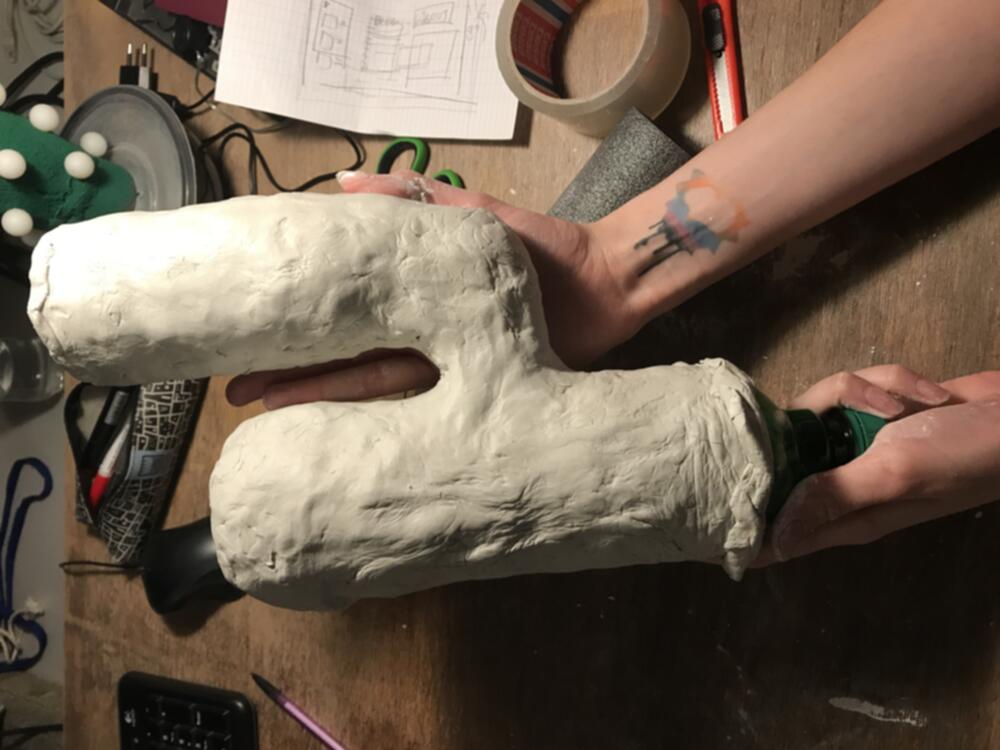
This time we used a modeling clay and went for a fancier shape of the cactus. We tried planning things, but the “just do it and pray” method took over: we’ve connected two plastic bottles together using random stuff (cardboard, piping foam leftovers, lots of tape) and covered them with the modeling clay.
It looked pretty well and robust enough, but there was an issue: how to get the bottles out? Oh, by the way, the bottle was previously used for a home-made schnaps, so the whole thing smelled like booze. A lot.
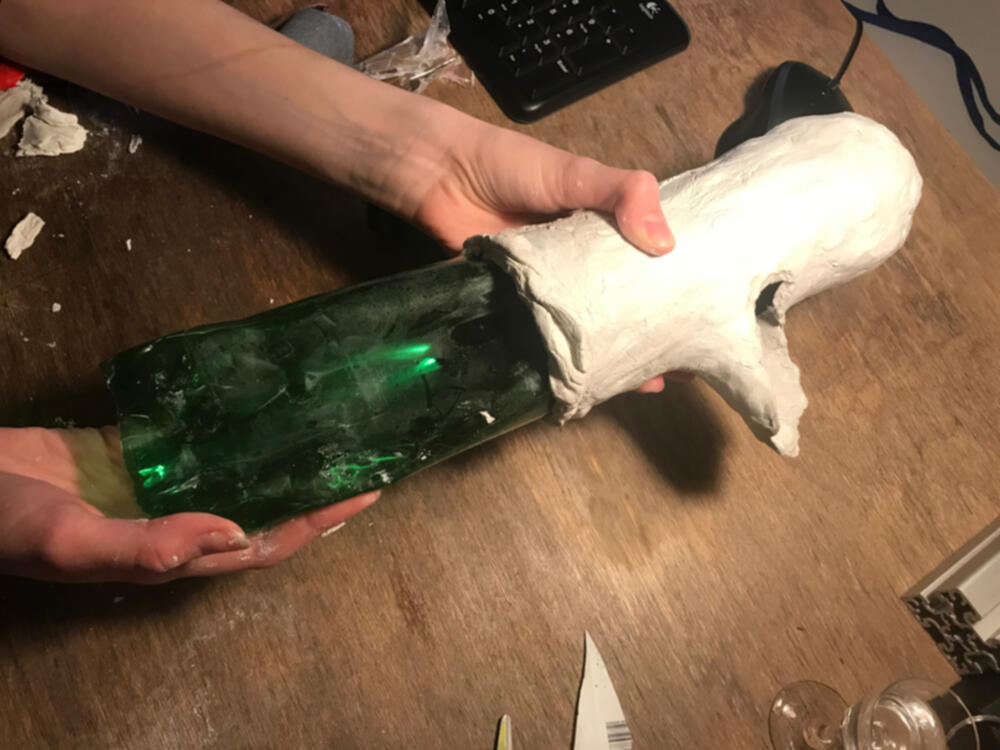
We detached the “arm” of the cactus by somehow cutting it off and pulled the main bottle out. Same thing for the smaller bottle and the joint between the two. Somehow. Not without damage though, but nothing that couldn’t be fixed with more clay :)
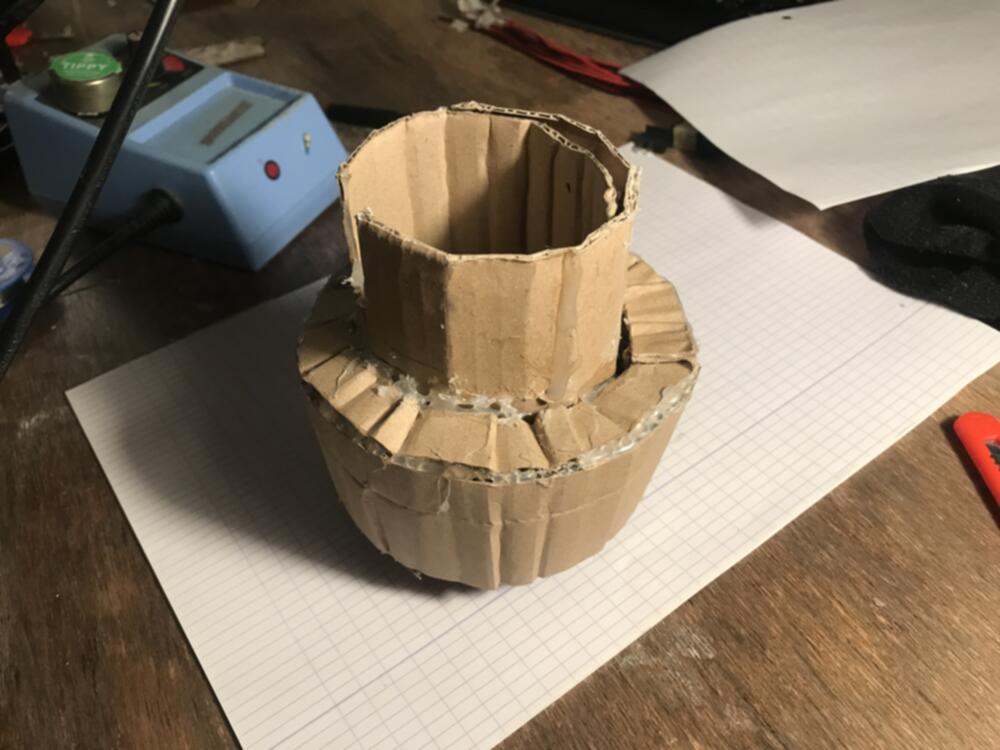
In order to make it more robust, we used an actual flower pot and hacked together a cardboard mount for the cactus.
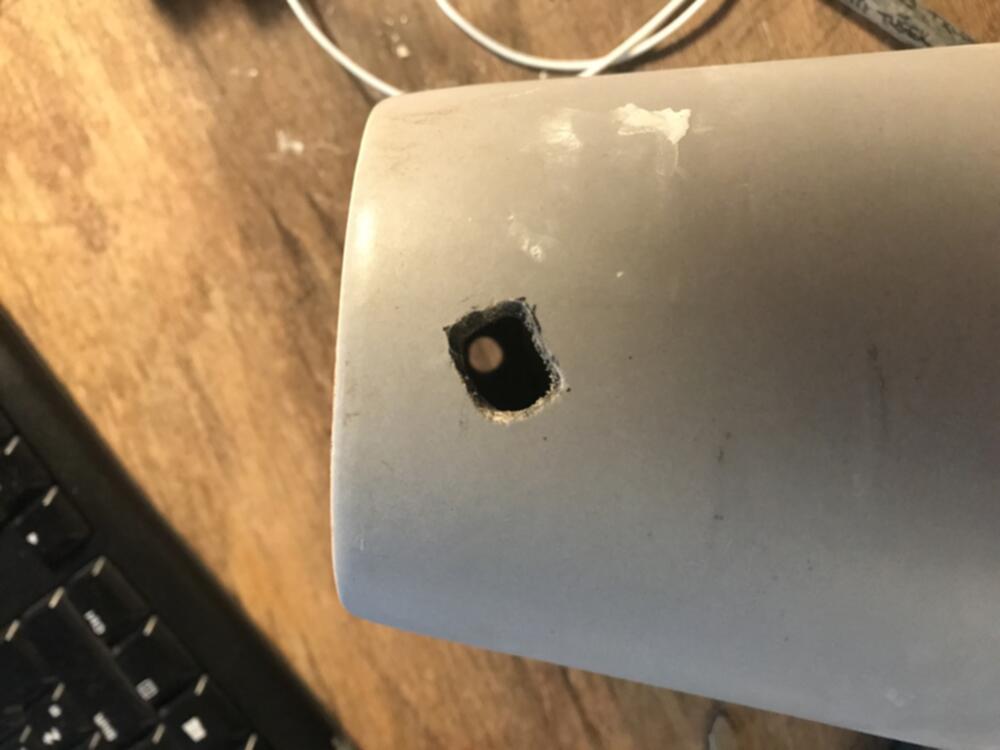
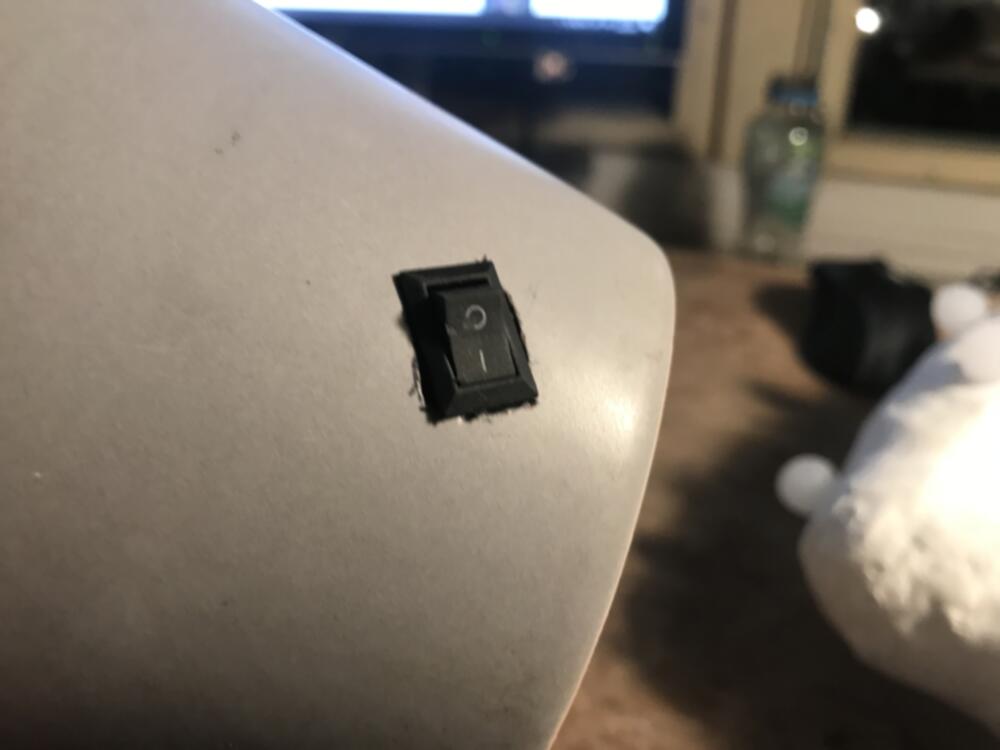
Drilling a hole into the pot was a real pain in the ass, but we wanted to mount a switch properly. It took a loong time and a drill-bit was getting really hot, but in the end it worked out and it looks pretty cool.
Electronics
NO DUCT TAPE THIS TIME!!! The previous cactus was powered by an USB charger which “worked” but didn’t look nice and the cable was too short. All of its wires were “protected” by a regular tape, some of the LEDs were connected in series and half of them didn’t work.
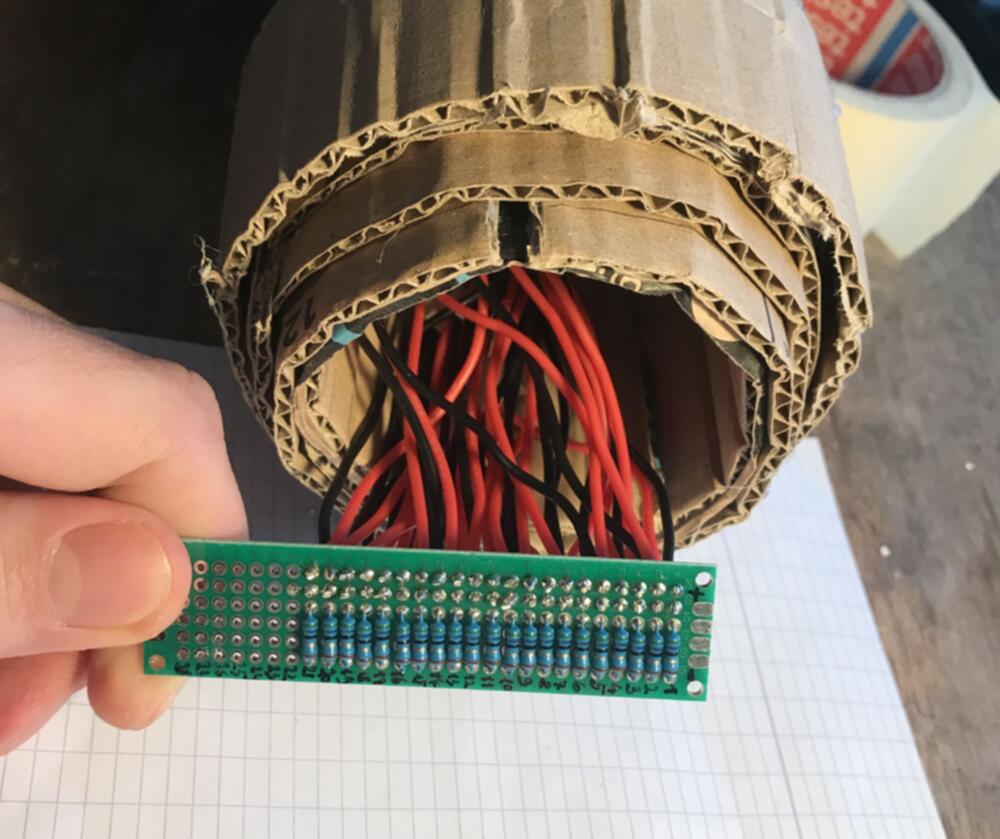
This time I’ve put some more love into the wiring:
Wiring and soldering everything together took about 6 hours. The most annoying and time-consuming task was getting the wires through the cactus (small hole IN, bottom opening OUT). Is there a smart way to do this? Anyways, all of the LEDs work! No accidental blinking!
Das-mas cactus
That was it, it turned out pretty well I think. Look at the photos :)
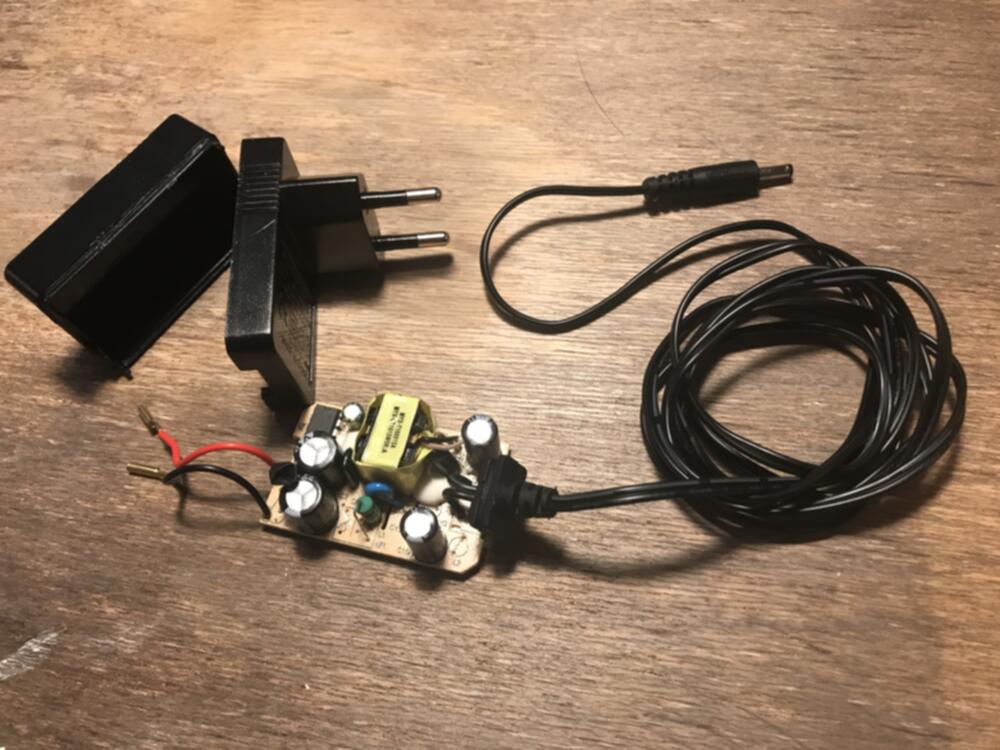
A cheap chinese power supply, 5V, 2A (originally included with an USB hub, makes a high-pitched noise when powered). Removed the metal conectors and got the wires out, but everything is still in the enclosure, for safety reasons. ↩