A DIY bed frame
When I first moved into my tiny room, it was…really sad. Most of the furniture was really old and worn out, barely holding together. Replacing the bed with a foldable futon was exciting at first, but I soon realised it is not too comfortable as a sofa. That is when I quitted my morning ritual of folding it up, and started wishing for something more suitable for the space. I did love the firmness and groundedness of it though. Oh, and it was also really cold in the winters, you could feel the cold air radiating through the mattress from the ground.
This was during a time where I lost all my interest in software related stuff, and practically did not touch my computer for over a year. My flatmate Janez was getting into woodworking at the time, for similar reasons, which was a great inspiration to try it myself. I am going to build my own bed!
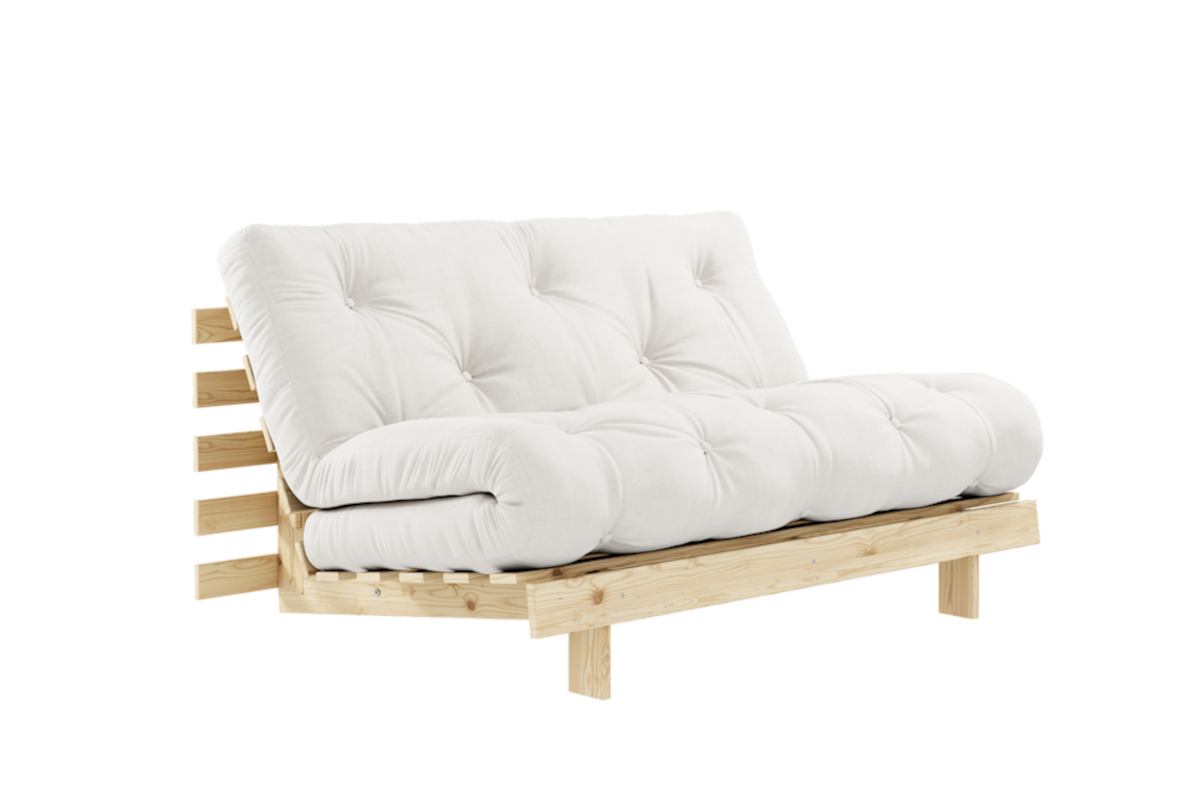
The futon sofa-bed, that I originally used (folded).
Image source.
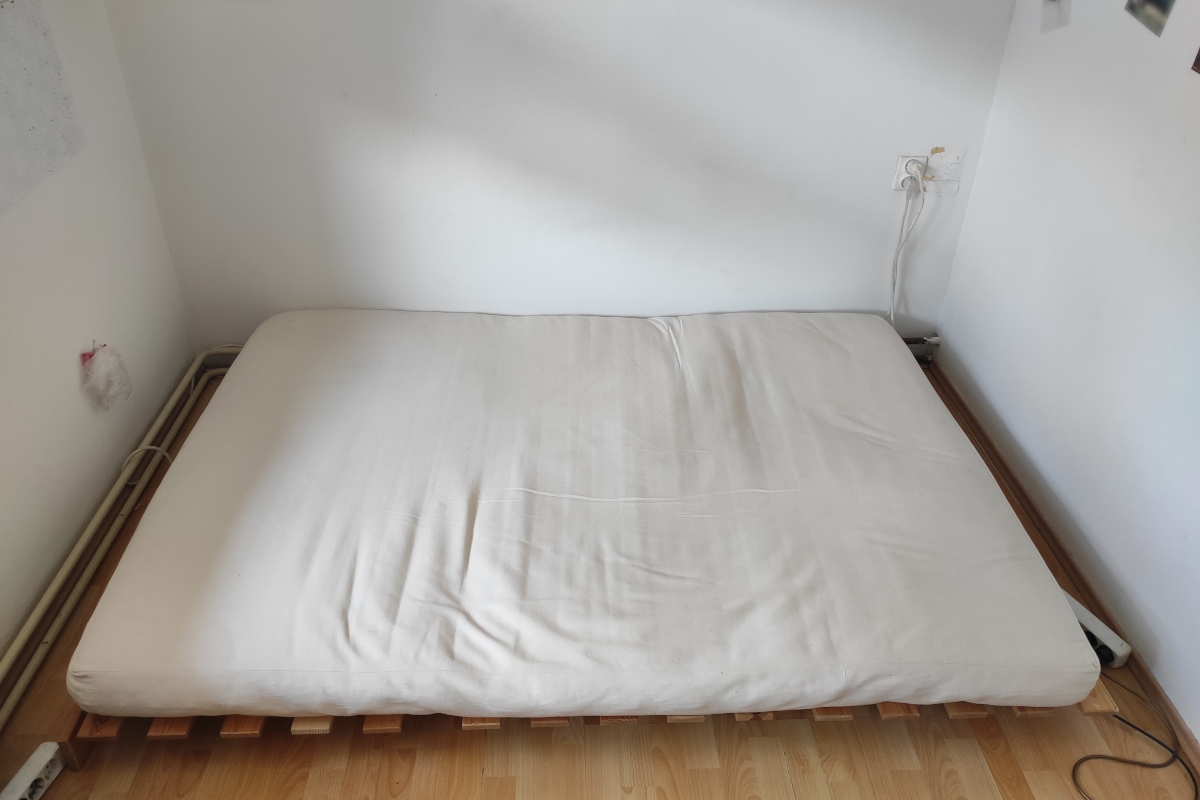
The same futon sofa-bed (unfolded).
Design
This were the design requirements I started off with:
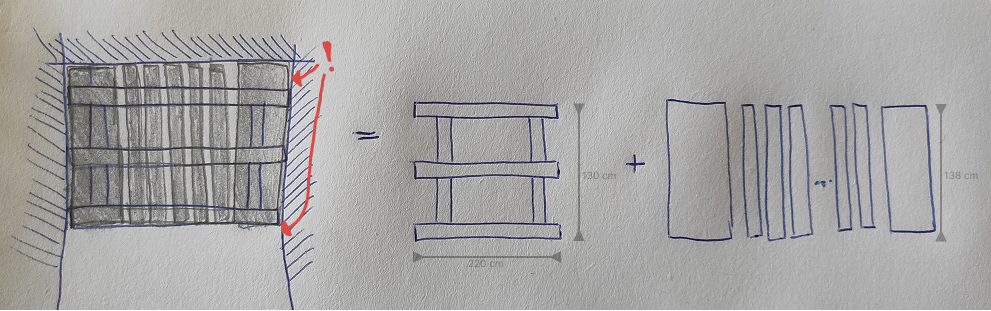
- 140cm x 200cm x 20cm mattress
- 50cm of storage space underneath
- spanning from wall-to-wall
- sturdy and not squeaking
I considered multiple options regarding the bed frame design: three plywood boxes, only box frames, or simply a platform with four legs. The latter turned out to be the simplest and cheapest to do, but opened lots of questions: do I need two or three long beams? What thickness and type of wood should I use? What joints to use? Will the legs work okay? Do I need 4 or more legs? And so on…
Luckily, I had a woodworking mentor with lots of experience in building beds, with whom we resolved many of these - thanks Izidor!
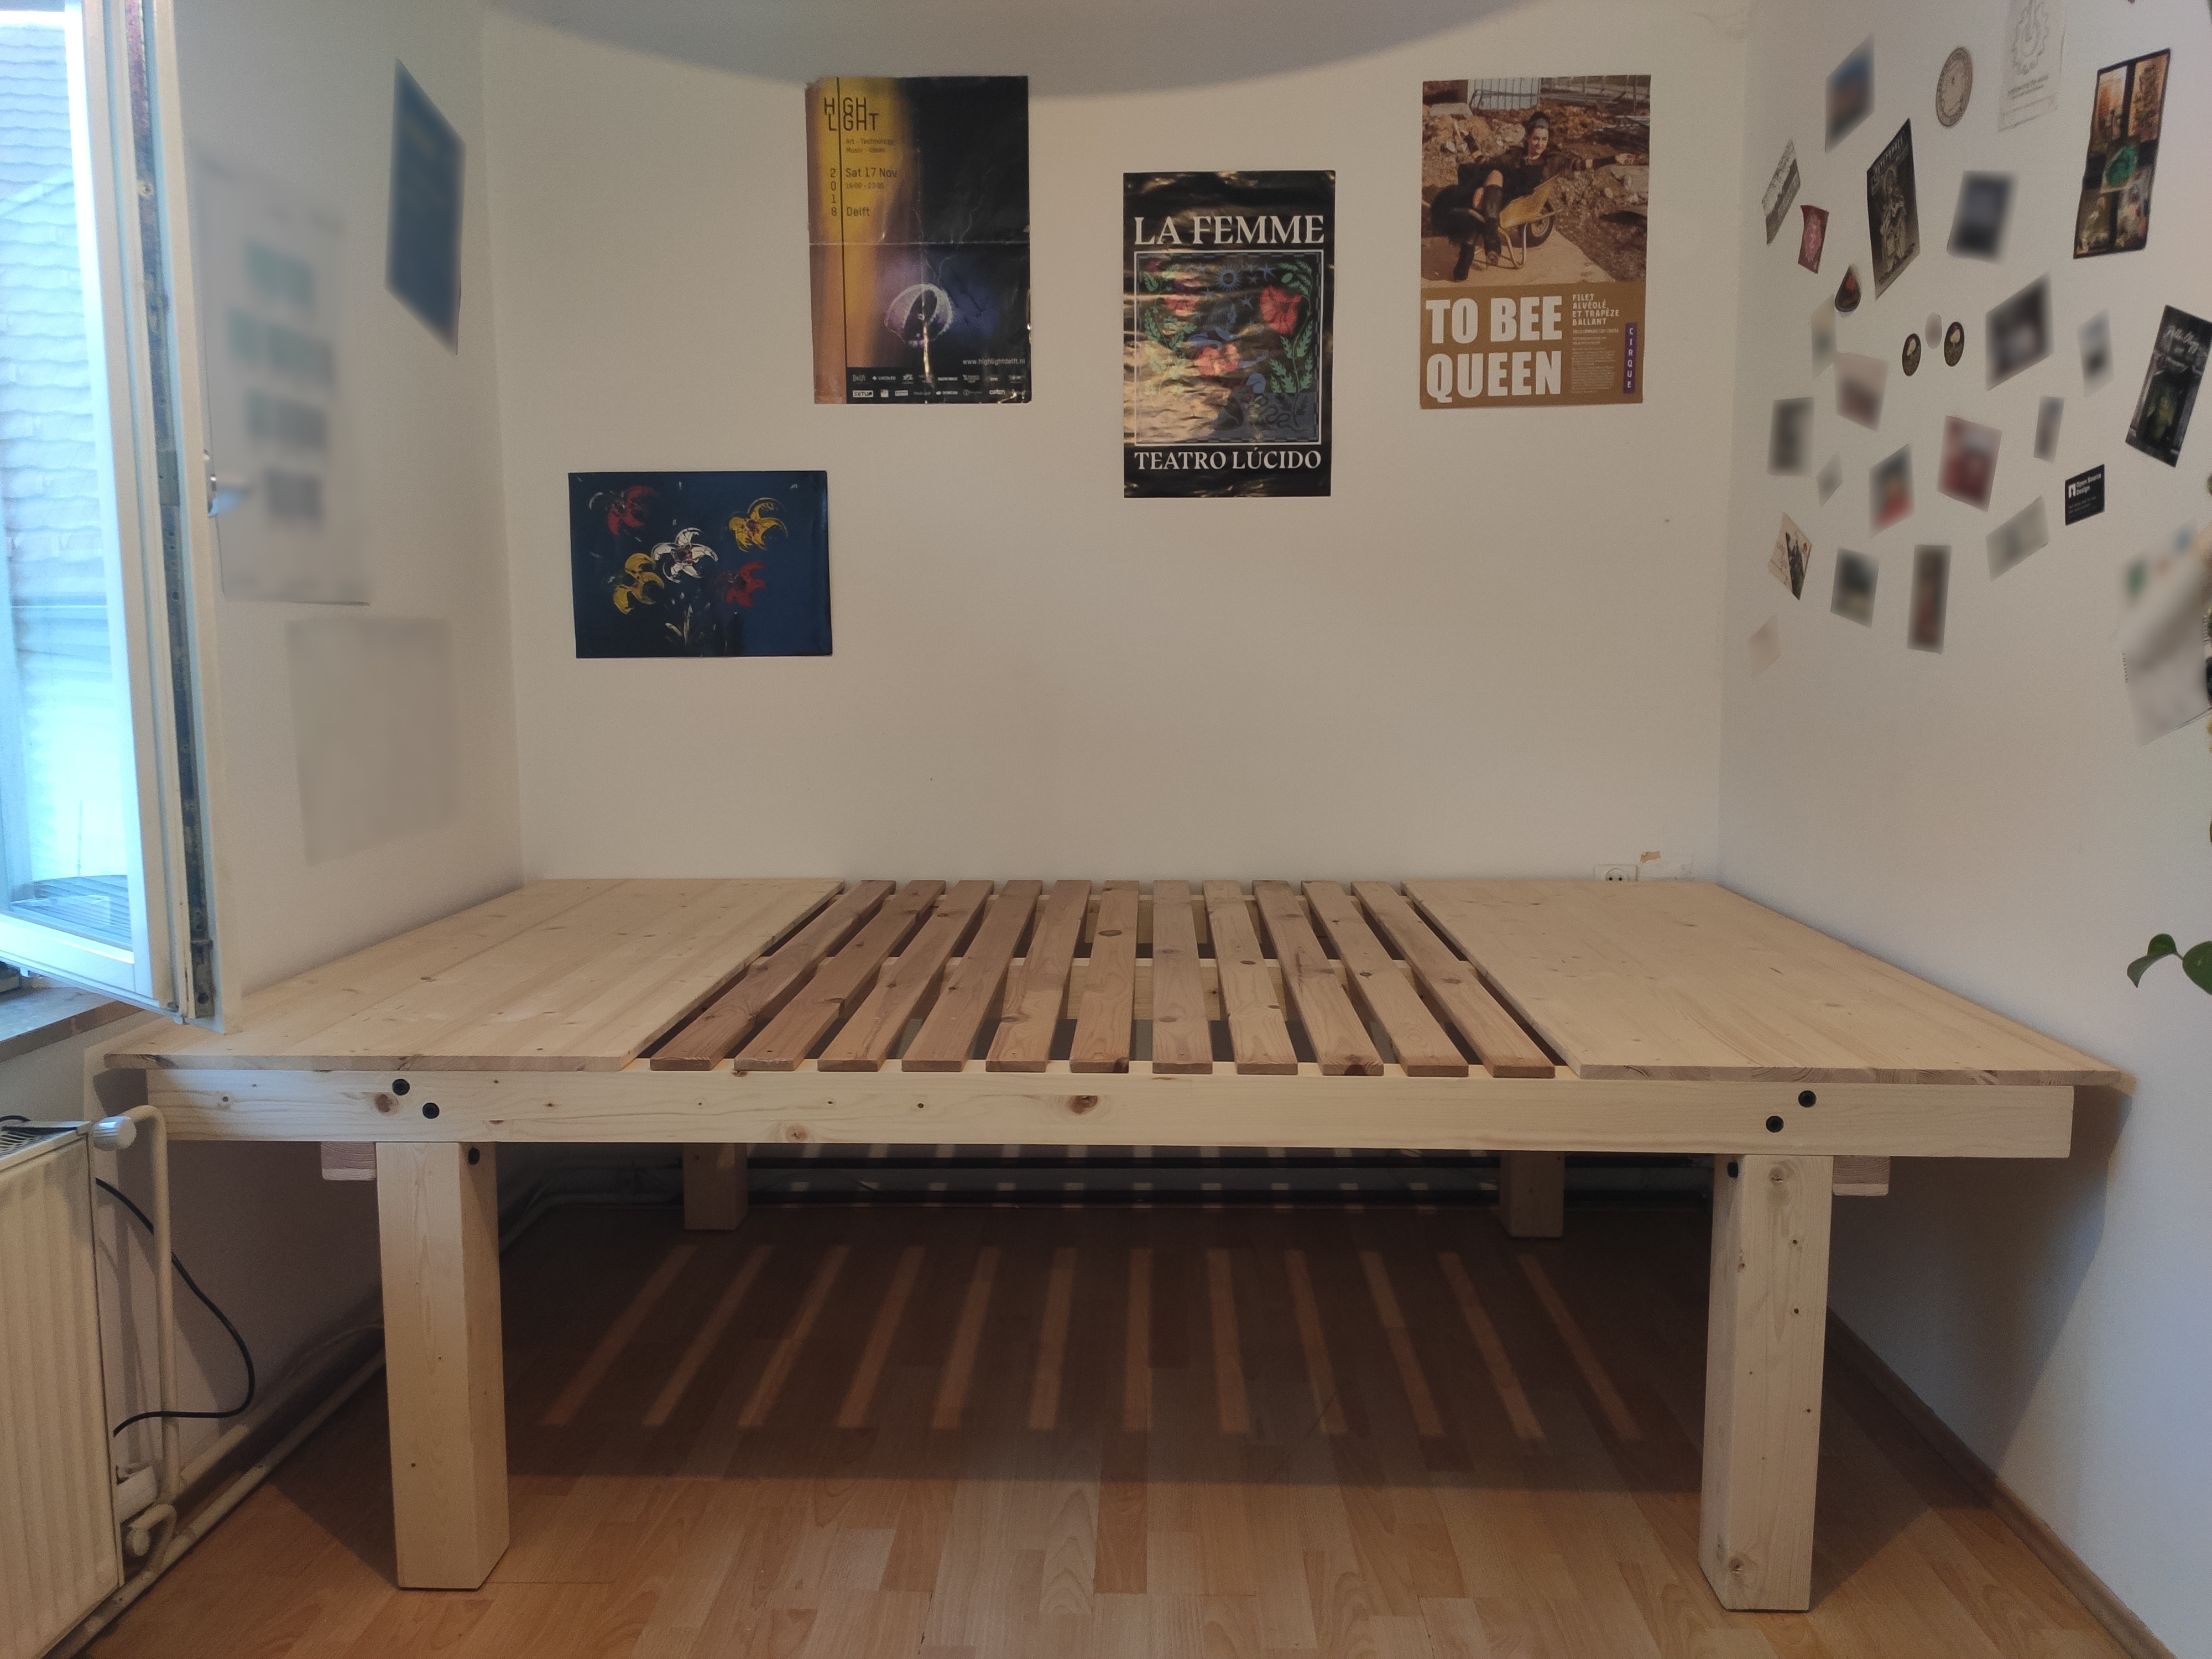
This is the final design I went for:
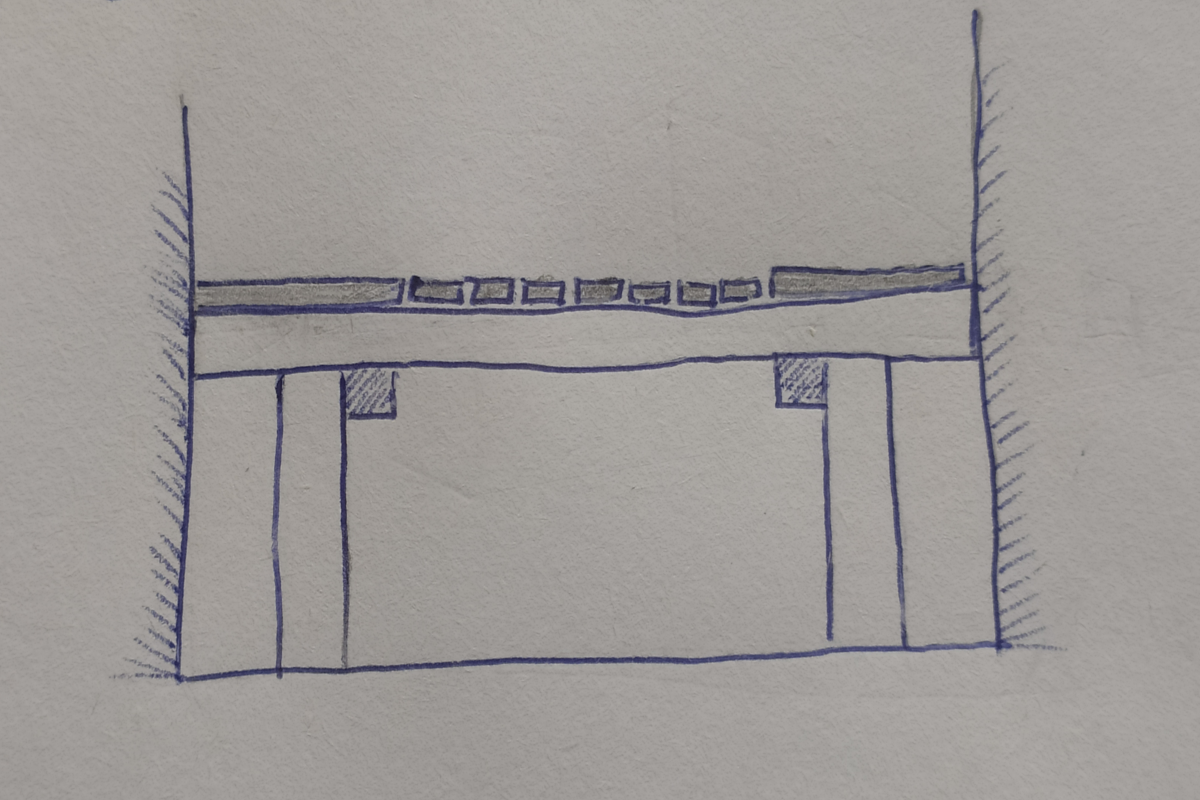
Front view.
Top view.
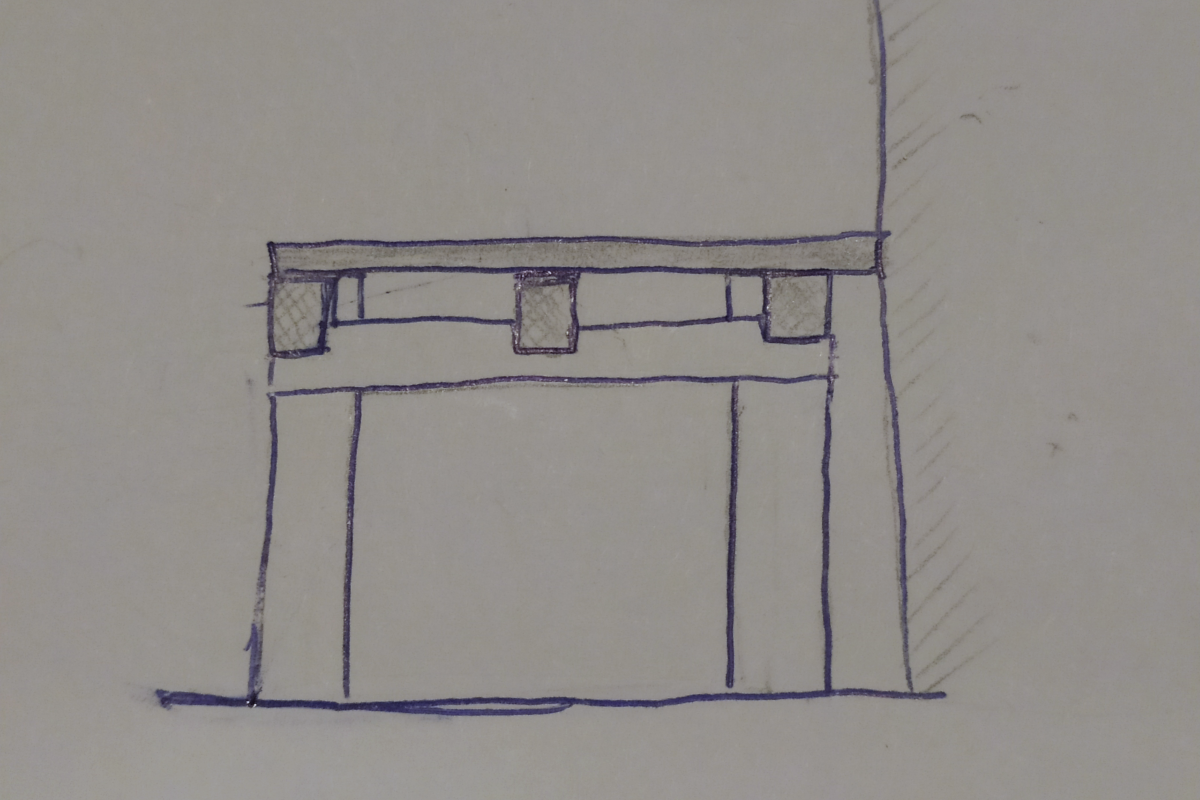
Side view.
Materials
I decided to use spruce construction wood (laminated glued beams), as it was the cheapest and sturdiest option available. Not sure if using construction wood for indoor furniture is a bad idea in terms of health, but oh well… that’s what I can afford at this point.
The bill of materials:
- 6cm x 9cm beams for the frame
- 10cm x 10cm beams for the legs
- 1.8cm thick planks for the sides (which, conveniently, matches the height of the slats)
- M10 bolts and nuts
My first fail happened, before I even got the materials to the workshop! Since you can only order beams of 3 or 4 meters, they have to be cut up for transport - they do it for free at the store! However, something went wrong when I calculated these “transport” dimensions, and I ended up with a beam that is 20 cm too short. Luckily, there was a spare one in the workshop, which I could use.
Another fail struck me when cutting the beams to size. Seasoned woodworkers told me not to trust the bottom part of store-bought materials to be flat and/or perpendicular. One should cut a thin slice off the end, and only then measure, mark and cut to desired length. Well… that didn’t happen. I noticed my mistake and somehow repeated it again, and at that point I just gave up and hoped for the best. That is how I ended up with ~2 mm shorter beams than planned, but only my engineering ego will be affected by this, and nobody else.
Woodworking
The hardest and biggest part of this project was the joinery. I learned that the so-called “half-lap” joint is suitable in my case, as it provides good stability while being relatively easy to do.
With the beams cut to size, I started drawing the half-lap joints on the pieces.

Half-lap joint markings on a 10cm x 10cm wooden beam. The other three behind it are already cut out. This are the legs of the bed frame.
Due to thick size of wood, I used a miter saw for cutting the joints, and cleaned up with a chisel. In retrospect, using a table saw might be a better option in terms of precision and convenience, but that worked as well. My very first half-lap joints look fine to me!

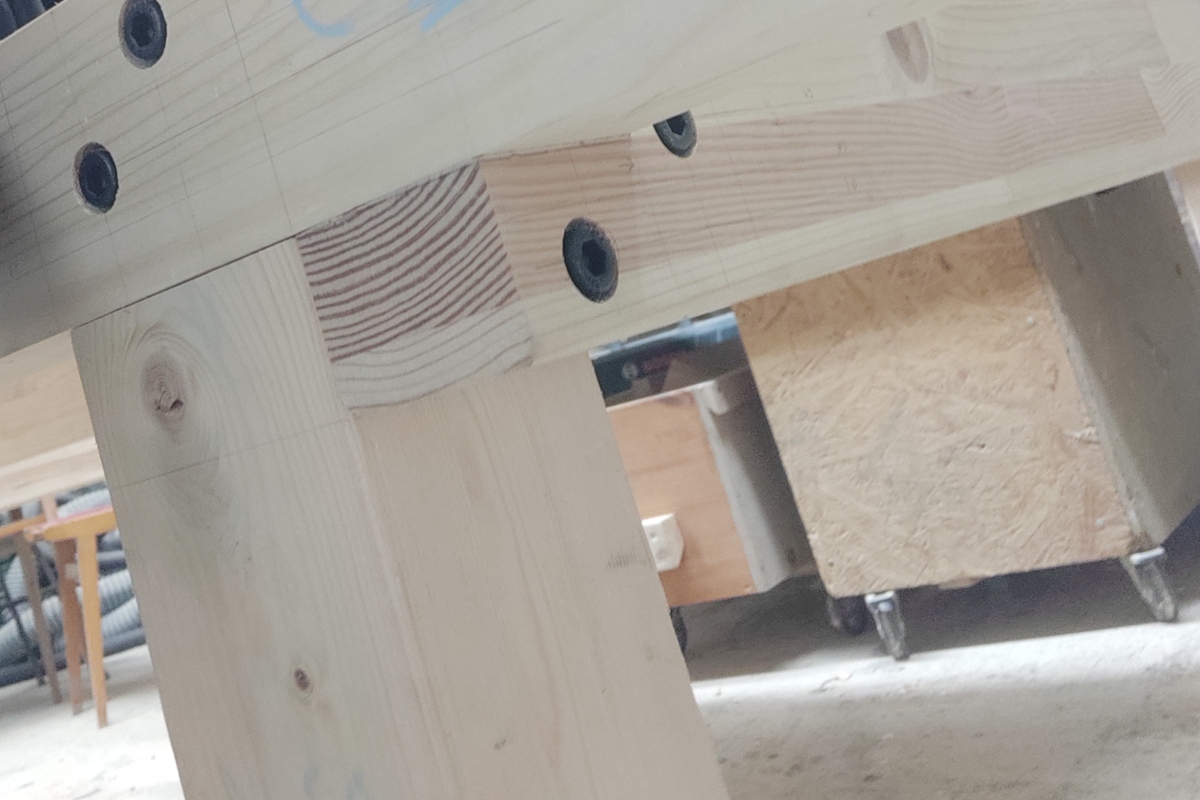
Half-lap joint demonstration, on one of the legs and a side beam. Later, the two pieces will be fastened using two bolts and nuts.
The two pieces can be fixed together with either glue, screws, or big ass nuts and bolts - which is what I went for :) I made the holes for the bolts and nuts, using a benchtop drill press. That was the easy part, while determining and marking the hole positions took much more time and effort.
Finally, I sanded and coated everything with a wood preservative (the one thing that was available at the workshop and easy to use). But wait! While this fits into a single sentence, it actually took two or more afternoons :’)
Fully assembled half-lap joint, with bolts and nuts attached. Awkward photo framing, I know.
I was incredibly happy when I first assembled the frame together, bolted the legs and sat on it. NO SQUEAKING AND NO WOBBLING, super sturdy feeling, fuckyeah!
Cost and time breakdown
| wood | 220 € |
| bolts | 40 € |
| workshop | 100 € |
| TOTAL | 360 € |
Time spent on this project is approximately 15 half-days, including 2 days of design, research and shopping.
Reflection
Half a year later, the bed is still sturdy and not squeaking. It has the same firm feeling, as sleeping on the ground, but provides lots of storage underneath and on the sides. The shelf at the foot side is covered with a pile of used clothes, so it is already an indispensable part of my room. It is one of my favourite and most successful DIY projects so far, really satisfied with it :)
Gallery


